Remote help is the good ole Quick Assist on steroids. With added security and more possibilities, Remote Help is used to support users through remote control of their devices.
Remote Help should be considered and evaluated if your organization is looking for a remote control tool, and the administrator experience is great as it supports conditional access, and is configured and used in the Intune portal (single pane of glass).
It is included in the Intune Suite and as a standalone addon-on to Intune.
🗝️In this post we will have a look at how harden the security around Remote Help by using Intune RBAC and device scopes, and we will require security keys as an additional layer of protection.
Remote Help requires you to sign in with your work account before delivering or getting support through the app. This is where we have the chance to further secure the sign in to fit our need.
🛡️Being an administrator comes with high privileges and a high level of trust from your organization. These privileges should always be secured – hence I will assume that Entra ID Plan 2 (AADPP2) is available to at least all administrators.
💡Read the full post before getting started as there are a couple of different approaches and you might miss out if you just follow the steps 1-by-1.
Let’s rock enroll!
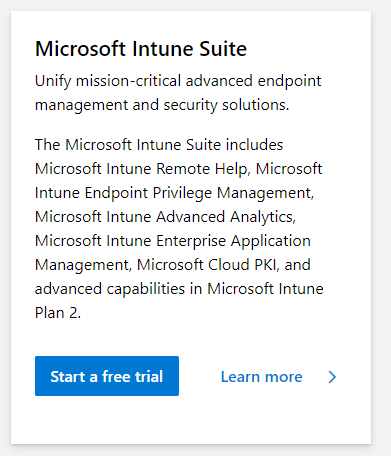
Remote Help: Trial license
We can use this URL to enable the full Intune Suite trial: Microsoft Security Free Trial | Microsoft Security
Remote Help: Download scripts
I have created scripts that may be helpful. These scripts are not required, but may help with automation if you need to reuse it for multiple tenants.
💡It could make sense to create a single script instead of having multiple, I will share them as individual scripts to make it easy for you to pick what you need.
❗You must register an app with delegated permissions before running the scripts. I will not cover how to do that in this post, but there are a ton of resources out there to get you going.
In this post I show the steps needed: App registration (scroll down to Prerequisites: Register the app).
💡Each script-file lists the needed permissions, have a look before getting started.
Remote Help: Device groups
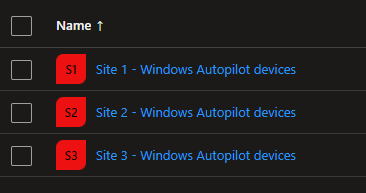
The first thing we want to do is create our site specific device groups.
💡Feel free to skip this step and use any already existing, suitable groups in your tenant.
Take either the manual or Autopilot groups tag approach to create the necessary groups.
💡I recommend the group tag approach as it saves time on manual work, but the manual approach makes sense for testing.
Remote Help: Device groups (manual)
- Create Entra ID device groups as per your need. I recommend the use of dynamic groups to make sure no devices are missed.
Remote Help: Device groups (Autopilot and group tags)
My fellow MVP Jannik mentions a good solution on how to add the tags (which we will create later on) to our Windows Autopilot devices. Check Janniks post here.
It basically comes down to using dynamic groups and Autopilot group tags when the device hash id is uploaded to the Windows Autopilot service.
Us administrators will save some time on this as it can be done by the OEM when the device is ordered.
⚙️We are taking this approach for the duration of the post, as we like to automate or at least semi-automate things 😉
- Edit: “Remote Help – Create Entra ID Device Groups.ps1“
- Add your site names to the $siteNames variable

- Run the script and find your site groups
Remote Help: Scope tags
The next thing we want to do is create scope tags which will be assigned to our site specific device groups.
💡It is a good practice to not allow all administrators to be able to manage all devices. This is not limited to Remote Help, but as a general recommendation I would like to highlight.
Below table describes what we will achieve by using device tags in our scenario.
| Admins from Site 1 | Remote Help permissions to site 1 devices only |
| Admins from Site 2 | Remote Help permissions to site 2 devices only |
| Admins from Site 3 | Remote Help permissions to site 3 devices only |
Remote Help: Create Scope tags (manual)
In this scenario, we will allow full Remote Help privileges for our site specific admins. You may change this as per your need.
- Open: Intune portal -> Tenant administration -> Roles -> Scope tags
- Create: The scopes you need (one per site)
Remote Help: Create Scope tags (script)
- Open: “Remote Help – Create scope tags.ps1“
- Edit the $siteNames variable as per your need.

- Run the script and you will find your new and shiny scope tags

Remote Help: Assign Scope tags
Next step is to assign our scope tags, regardless of what method we used to create them.
- Assign each scope tag to its corresponding site device group

Remote Help: Admin groups
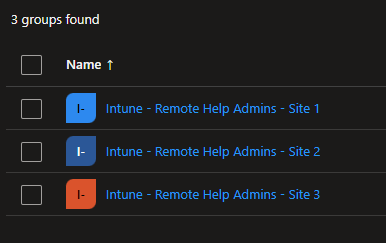
Next step is to create our site specific admin groups. These groups will be used to give our admins Remote Help permissions.
Use one of the methods below to create the needed admin groups.
Remote Help: Admin groups (manual)
- Create Entra ID admin groups as per your need. I recommend the use of static groups to make sure no users are added mistakenly.❗”Microsoft Entra Roles can be assign to the group” must to be set to Yes if you want to use PIM for groups later on.

Remote Help: Admin groups (script)
- Open: “Remote Help – Create Entra ID Admin Groups.ps1“.
- Add your site names to the $siteNames variable and run the script.
- Run the script and you will find your new Entra ID groups.
Remote Help: Assign Admin groups
If you decided to use PIM for groups to assign the Remote Help privileges you may skip this step.
But if you want to take the Conditional Access only approach, you may go ahead and add each site administrator to its corresponding group manually.
Remote Help: Intune RBAC
Intune RBAC is totally overseen and underused if you ask me. We use Intune RBAC to limit what an administrator can do with Intune (example: Remote Help admins can use Remote Help, but can’t do changes to Windows Autopilot).
💡Poking the bear even further: It is time for Intune admins out there to start using Intune RBAC instead of handing out the Intune Administrator role, when it is not needed.
Check this article for info on the available Intune RBAC permissions: Use Remote Help to assist users authenticated by your organization. | Microsoft Learn
Once we have a solid plan on RBAC permissions, it is time to create the custom Intune roles and assign them to our Remote Help administrators and corresponding devices.
Pick one of below options to create the custom role (by using the portal or script).
Option 1 Intune RBAC: Portal
This option makes sense when you want to create a single role manually for testing purposes.
- Open: Intune portal -> Tenant administration -> Roles
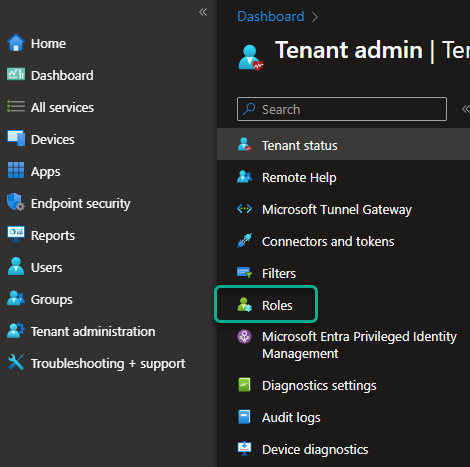
- Click: Create
- Name: Remote Help – Full (or by your choice).
- Description: This role gives full Remote Help privileges
- Click: Next
- Find: Remote Help app
- Select: The permissions you need. See below example.
- Click: Next
- Review the settings.
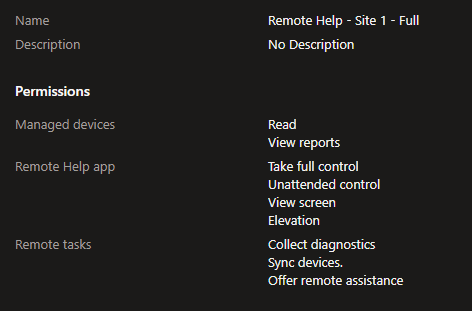
- Click: Create
Option 2 Intune RBAC: PowerShell
This option makes sense if you wish to create multiple roles and when you want to reuse same config for multiple tenants.
- Open: “Remote Help – Create Intune RBAC role”
- Add the tenantID and clientID to $connectionDetails

- Set allowed permissions by editing $allowedResourceActions (remember to remove the last comma (,) in the list.

- These permissions makes sense for site administrators, you might want to change the “unattended” permission if your organization doesn’t allow that.
- Edit the description and displayName, which is found inside of the $bodies variable, as per your need.
- Run the script and you will find the new custom role(s) ready for you.

Intune RBAC: Assign the role
Next step is to assign the custom roles we just created.
- Edit one of the newly created roles and click Assignments
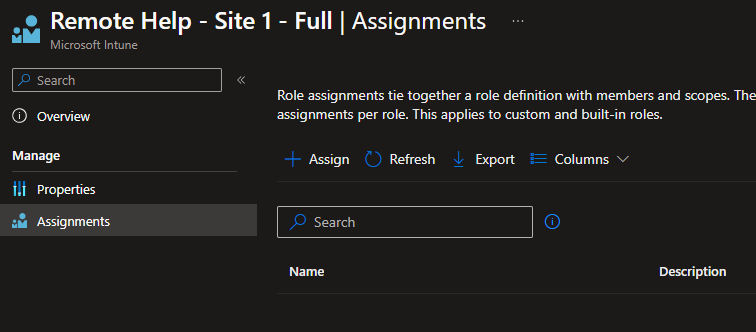
- Click: +Assign
- Name: Assignment – Site 1 – Remote Help – Admins (or something like that)
- Admin groups: pick the corresponding site admin group
- Scope groups: pick the corresponding site device group
- Scope tags: pick the corresponding scope tag
Remote Help: Hardening
The next step is to add a security key as an additional layer of protection.
We have two (but not necessarily limited to) options to accomplish this:
- PIM for groups + Conditional Access (applied when admins are being added to their corresponding groups.
- Conditional Access only (applied when signing in to the Remote Help app).
💡Both options support authentication strengths which is great!
In this scenario we will only allow:
- Authentication with security keys
- Only allow a specific type of security key, in this case YubiKey 5 NFC FW v5.1
To only allow a specific type of security key could be an overkill in some cases, but let’s try it out and learn about it together.
- The first thing we want to do is find the AAGUID of the security key(s) we want to allow.
- YubiKey AAGUID list: YubiKey AAGUID
- Feitan AAGUID list: Feitan AAGUID
💡Check the specific firmware version for the hardware you are using.
💡Multiple AAGUIDS can be allowed in the same policy. - The Entra ID sign-in log can be used to identify the AAGUID.

- Open: https://entra.microsoft.com -> Protection -> Authentication methods -> Authentication strengths
- Click: + New authentication strength
- Name: Pick a name of your choice
- Check: Passkeys (FIDO2)
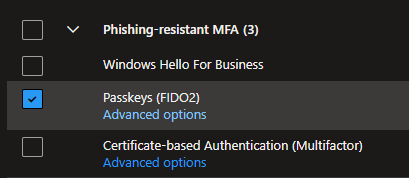
- Optional Click: Advanced options
- Optional Add each AAGUID you want to allow
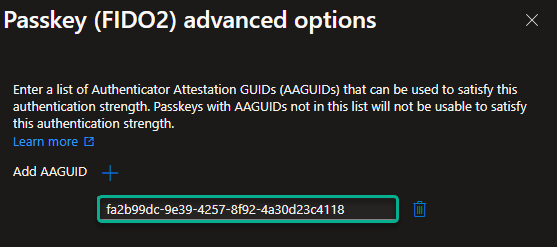
- Click: Next
- Click: Create
This is what it looks like when a non-approved security key is used.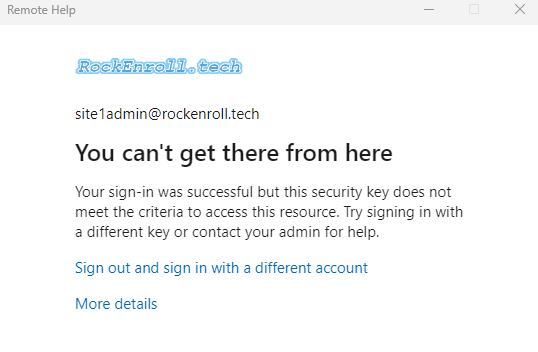
Now that we have an authentication strength, the next step is to use one of below options to add security keys as an additional layer of protection.
Remote Help: Hardening (PIM for groups)
The first option is to use PIM for groups to add administrators to its corresponding group.
PIM is a solid options as it allows for just-in time (JIT) privileges, but there is a time-gap between when the admin has enabled the role and when the corresponding permissions are active and usable.
⛔Challenge: Ideally we would add our new and shiny custom Intune RBAC role to PIM and have our administrators activate the role when needed, but PIM does unfortunately not support Intune RBAC.
✅Solution: We may however use PIM with group assignments which is not as great, but at least better than having the role permanently assigned.
👇Below is good to know when working with PIM for groups source

- Open: entra.microsoft.com -> Protection -> Conditional Access -> Authentication contexts
- Click: +New authentication context
- Give it a name
- Pick one of the IDs, it will automatically pick the first available ID if you have other existing contexts.
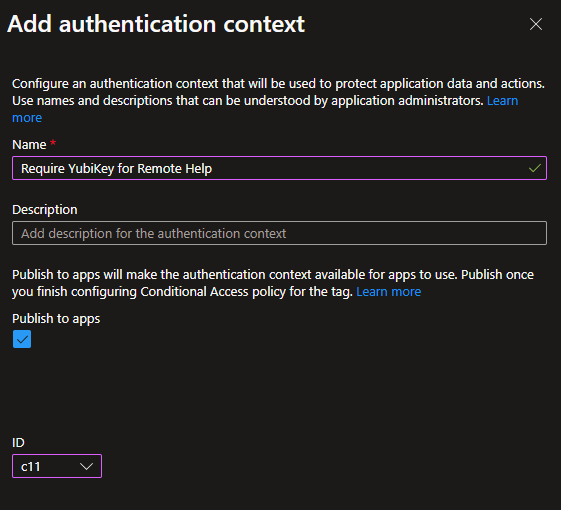
- Click: Save
- Open: entra.microsoft.com -> Identity governance -> Privileged Identity Management (PIM)
- Click: Groups
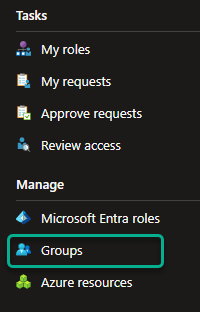
- Click: Discover groups
- Select your site admin group(s) and click Manage groups
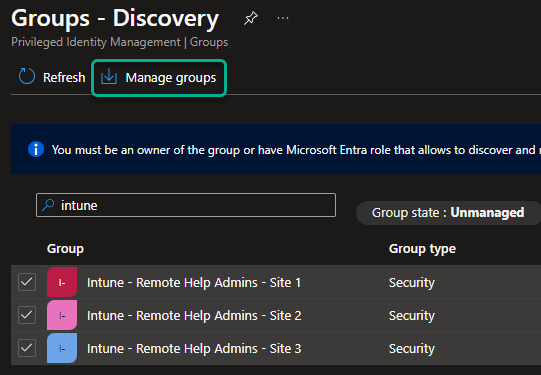
- Assign eligible Member roles to each corresponding administrator
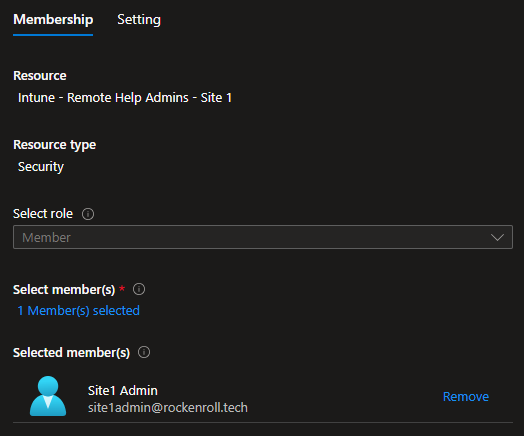
- Click: Settings
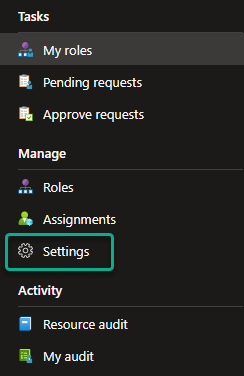
- Click: Member
- Click: Edit
- Check: Microsoft Entra Conditional Access authentication context
- Select: The authentication context we just created
- Click: Next twice
- Click: Update
- Open: entra.microsoft.com -> Protection -> Conditional Access
- Click: +Create new policy
- Name: CA – Remote Help Role – Require YubiKey (or a name by your choice)
- Users: Pick the Remote Help administrator groups we created before
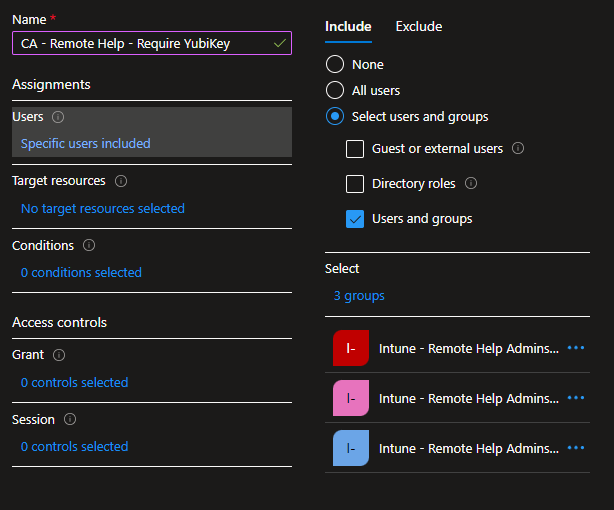
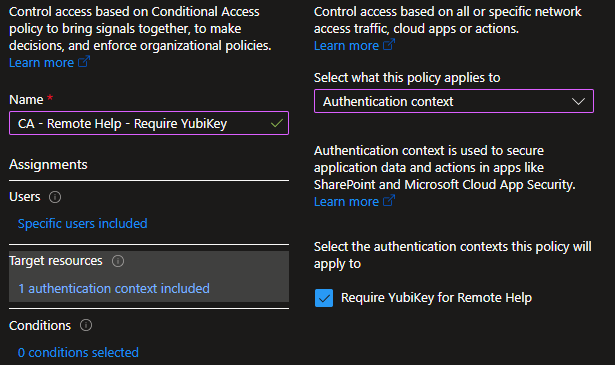
- Target resources: select the Authentication context we created before
- Grant: select the Authentication strength we created before
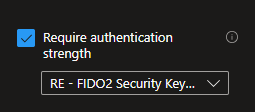
- Enable policy: On ❗(be sure not to lock yourself out in any way)
- Click: Create
✅There it is! Now any Remote Help admin can active their role by adding themselves to their corresponding group, by using PIM and their security key.
Remote Help: Hardening (Conditional Access only)
Our second option is to require a security key when starting and signing in to the Remote Help app as an administrator.
This is a viable option in most cases and is probably my most preferred solution as it is safe enough and the administrator experience is better.
💡This option is also built around authentication strength. But our Remote Help admins will have static memberships in their admin groups, and PIM will not be used.
💡I do not recommend using both options (PIM for groups and CA with the Remote Help app) at the same time, but please reach out to me if you find it suitable to do so. I am all ears!
💡We will use Conditional Access to require a security key when an admin signs in to the Remote Help app. To accomplish this we must first register an SPN as we do not have one for Remote Help out of the box.
❗Before we continue: Make sure your Remote Help admins have static membership to their corresponding admin groups.
- Follow this guide or use “Remote Help – Register SPN.ps1” to register the SPN.
- Open: entra.microsoft.com -> Protection -> Conditional Access
- Click: +Create new policy
- Name: CA – Remote Help – Require YubiKey (or a name by your choice)
- Users: Pick the Remote Help administrator groups we created before

- Target resources: RemoteAssistanceService (the app we registered in step 1).
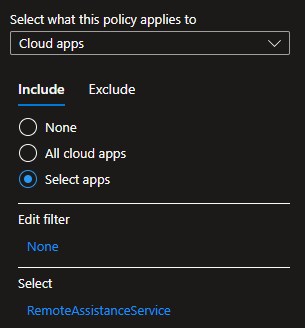
- Grant: select the Authentication strength we created before.

- Optional Session: Sign-in frequency: Every time
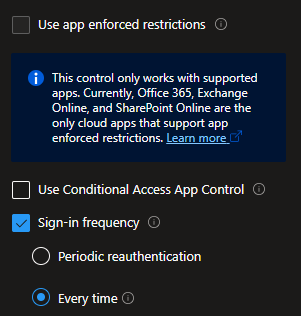
🤘There it is folks. We have now secured the access to Remote Help by:
- Intune RBAC will limit Intune permissions to Remote Help, instead of allowing everything.
- Scope tags will limit the visibility in the Intune portal to only relevant (site specific) objects.
- PIM for groups (optional) will give admins Remote Help permissions just-in time (JIT), we will require a security key as well.
- Conditional Access (optional) will require all Remote Help admins to authenticate with a security key.
⭐⭐⭐⭐⭐Remote Help is just excellent when it comes to the options we have to secure it using Entra ID, Intune and security keys.
😍Going the extra mile to secure privileged roles is just such a beautiful thing. The usage of security keys makes for an even better admin experience as no passwords are required.

