The idea of this tool was born when I released my latest tool, and I realized that I have created a lot of them. And I thought to myself: it is time to forge them all into one precious…… tool 😉

Use this tool and you will soon consider it better than second breakfast by being your close-by friend whenever you need to do tasks such as rebooting a W365 cloudPC, sync all devices or when you get a call from a user in dire need of the Bitlocker key (and much more).
New features will be added over time, so make sure to always run the latest version 😃
Disclaimer
❗As always: I recommend that you familiarize yourself with the tool in a lab tenant before usage in production environments.
The Tool is provided “AS IS” with no warranties.
Rock Enroll Tool: Expectations
Administrators can expect a faster and funnier way to do common Intune activities and the sassy colors are here to stay (that is a promise).
Rock Enroll Tool: Accessibility
I have done my best to make the tool including and accessible. The buttons are big, easy to click, support touch screens and the colors are high contrast. Please send me any feedback to make the tool even more accessible.
Rock Enroll Tool: Demo
Here follows demos that describes each functionality of the tool.
Rock Enroll Tool: Connect
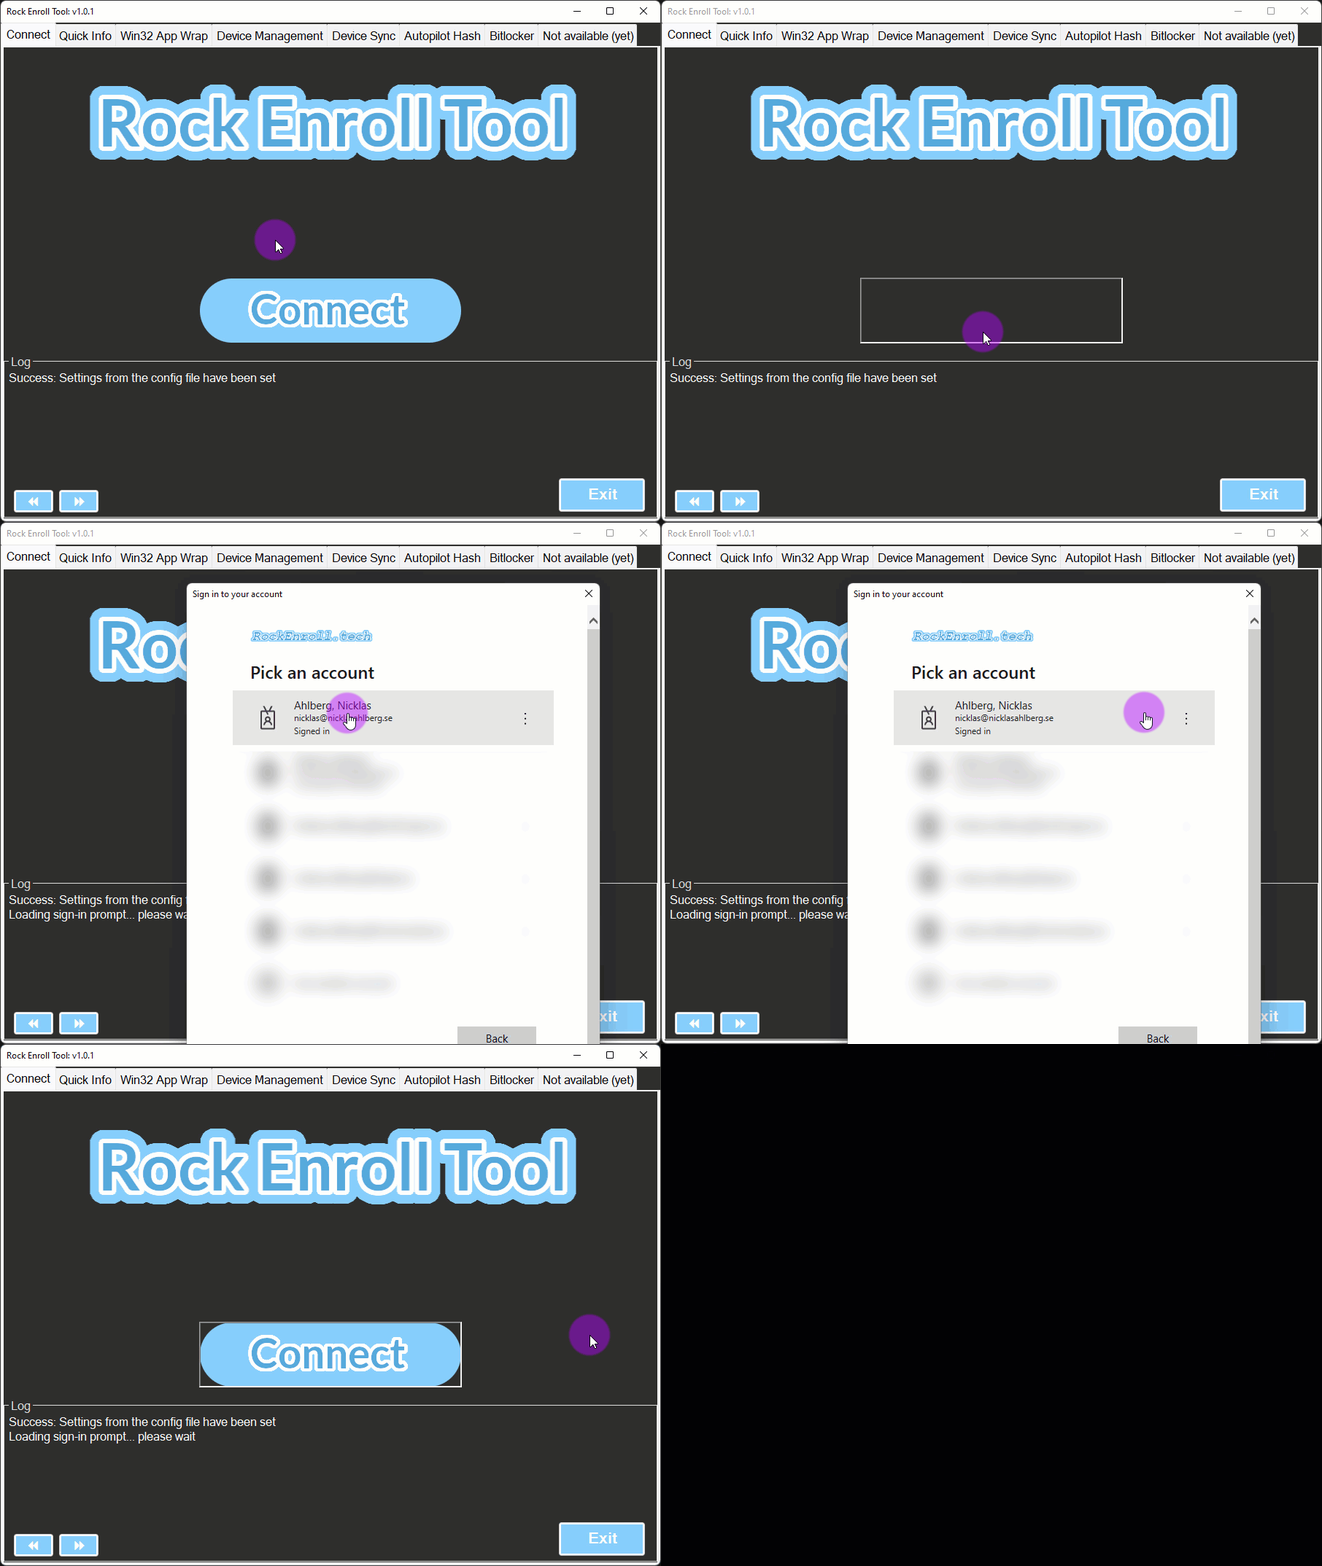
Easily connect to your tenant by the click of a button. The tenant and app info are loaded from config.txt
Rock Enroll Tool: Quick Info
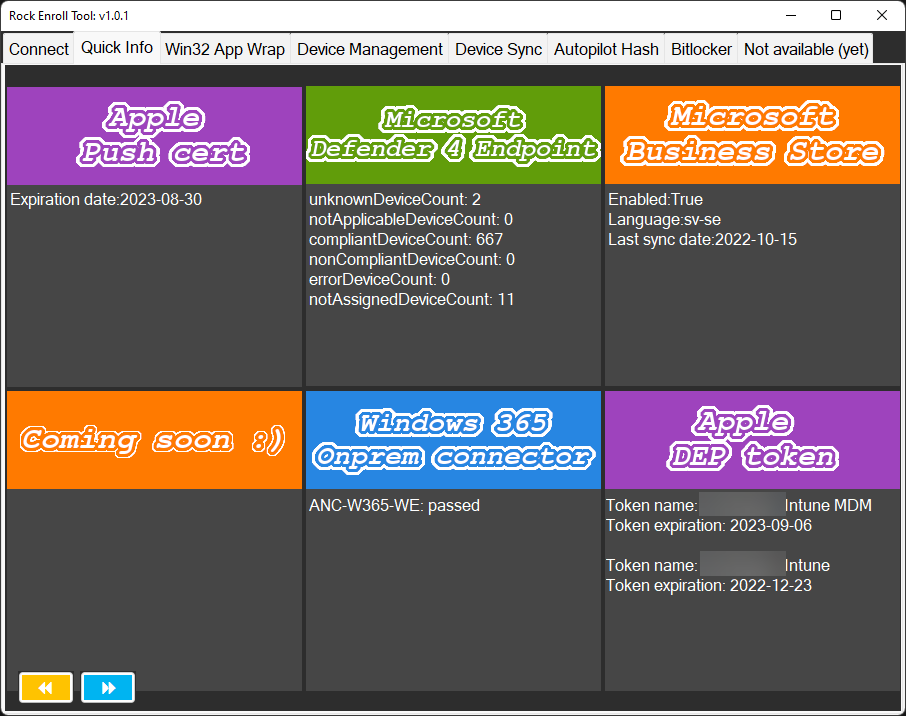
The Quick Info tab collects info from different places throughout our tenant and presents them in a single view. This tab is in-development and changes are expected in upcoming versions.
Rock Enroll Tool: Win32 App Wrap
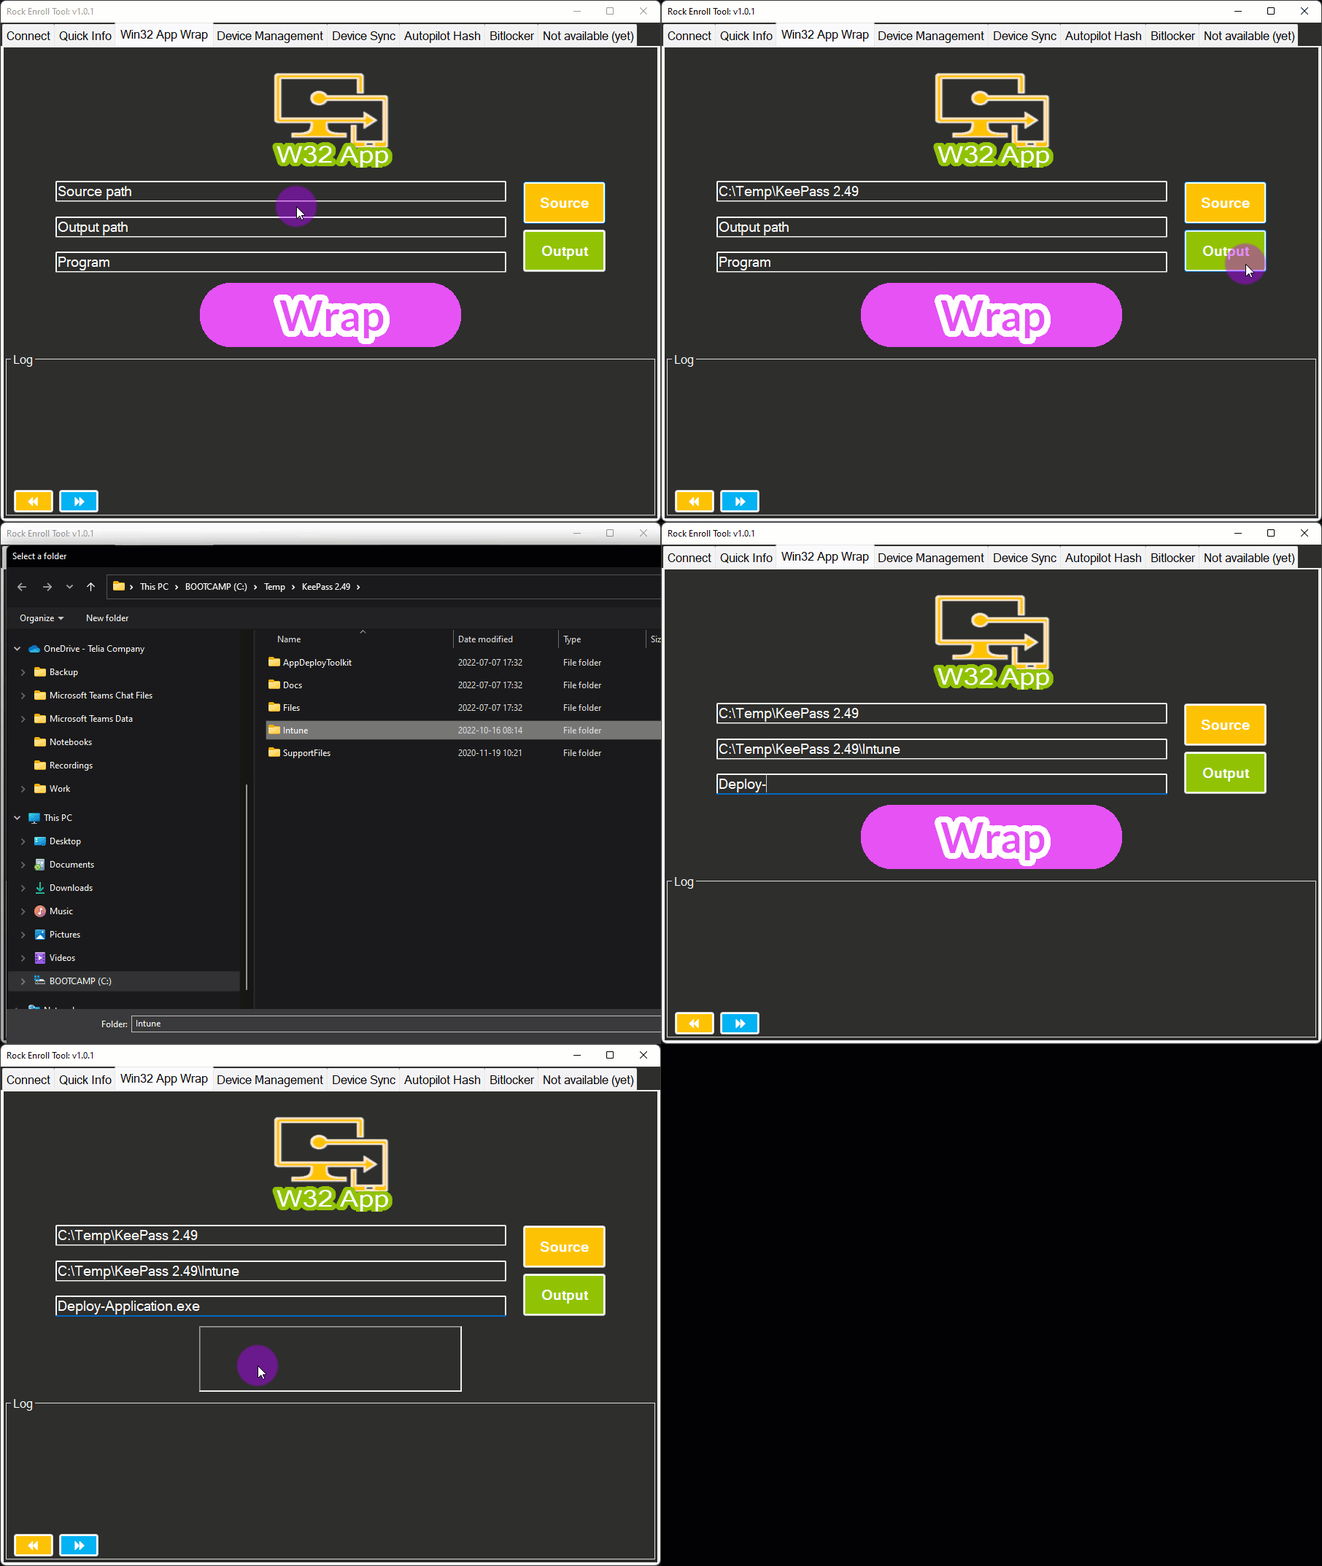
This tab will make it easier to wrap our apps into .intuneWin.
Rock Enroll Tool: Device Management
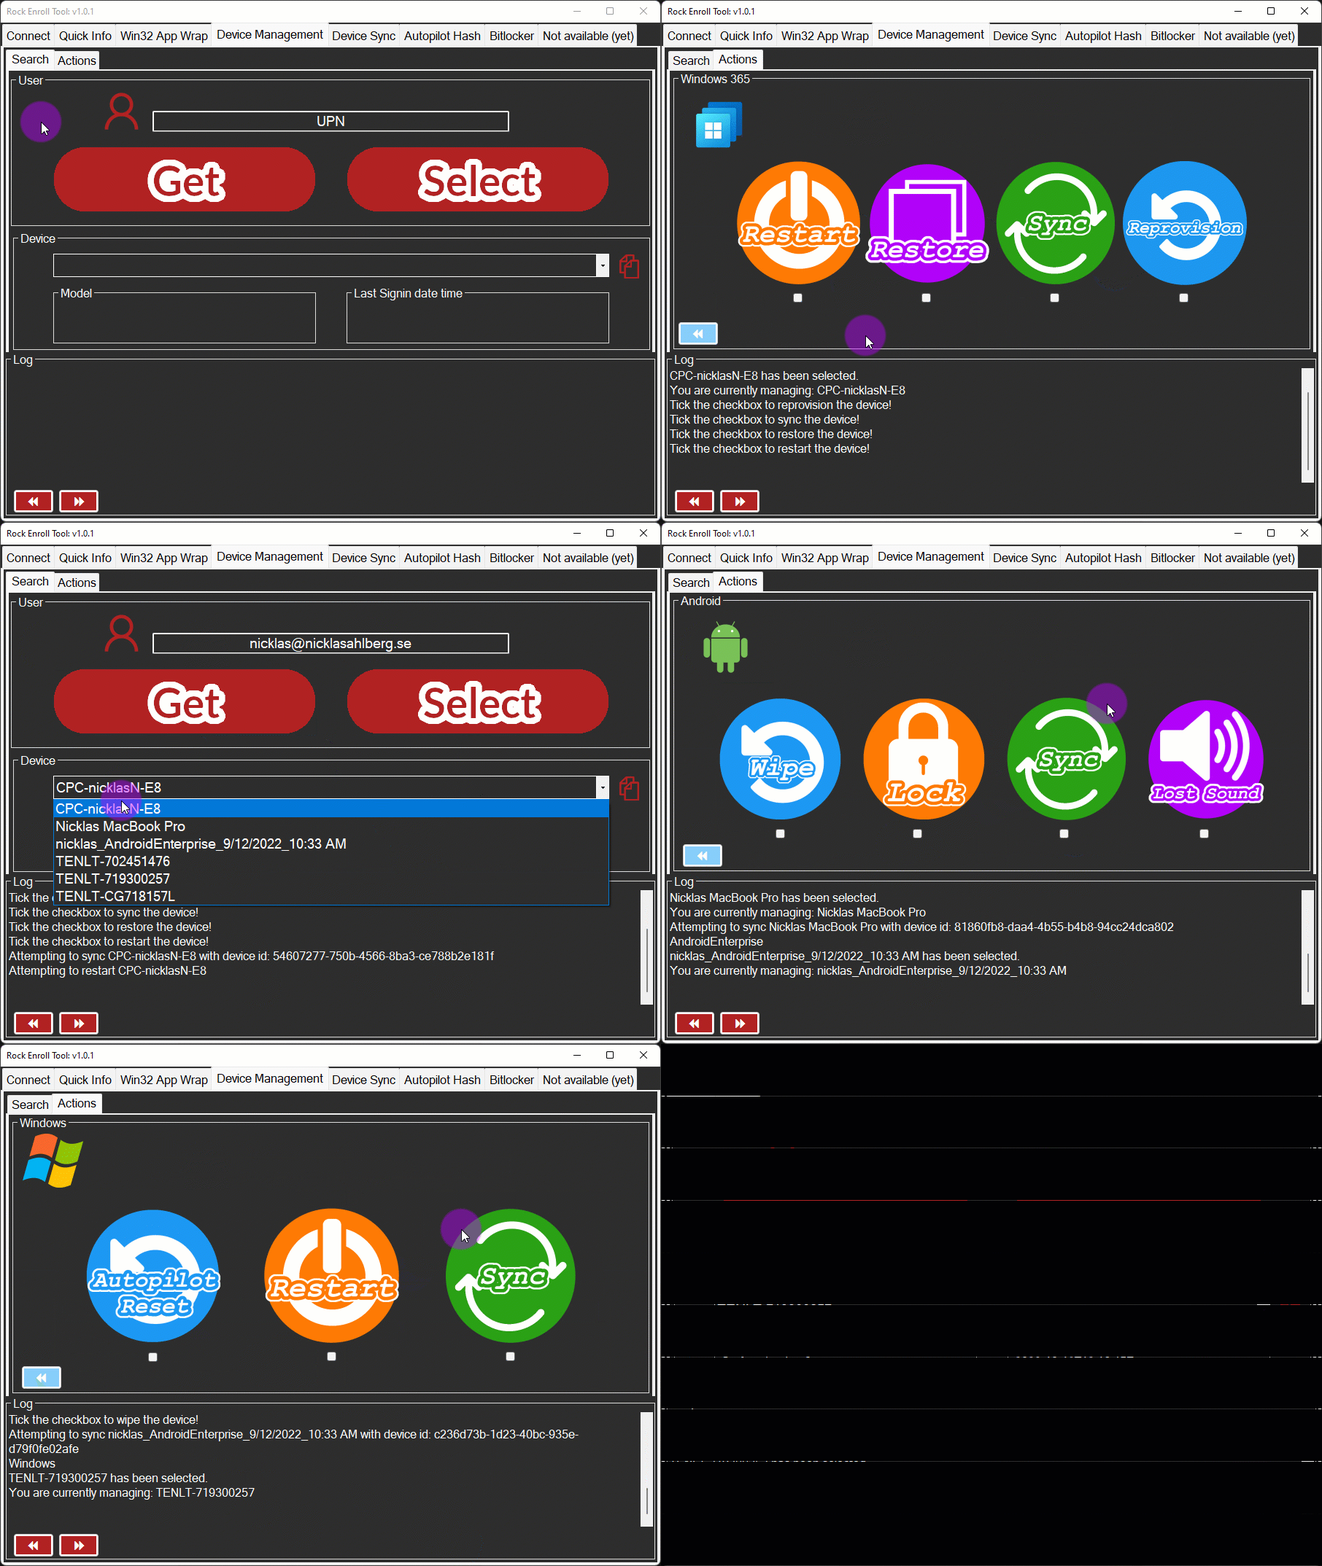
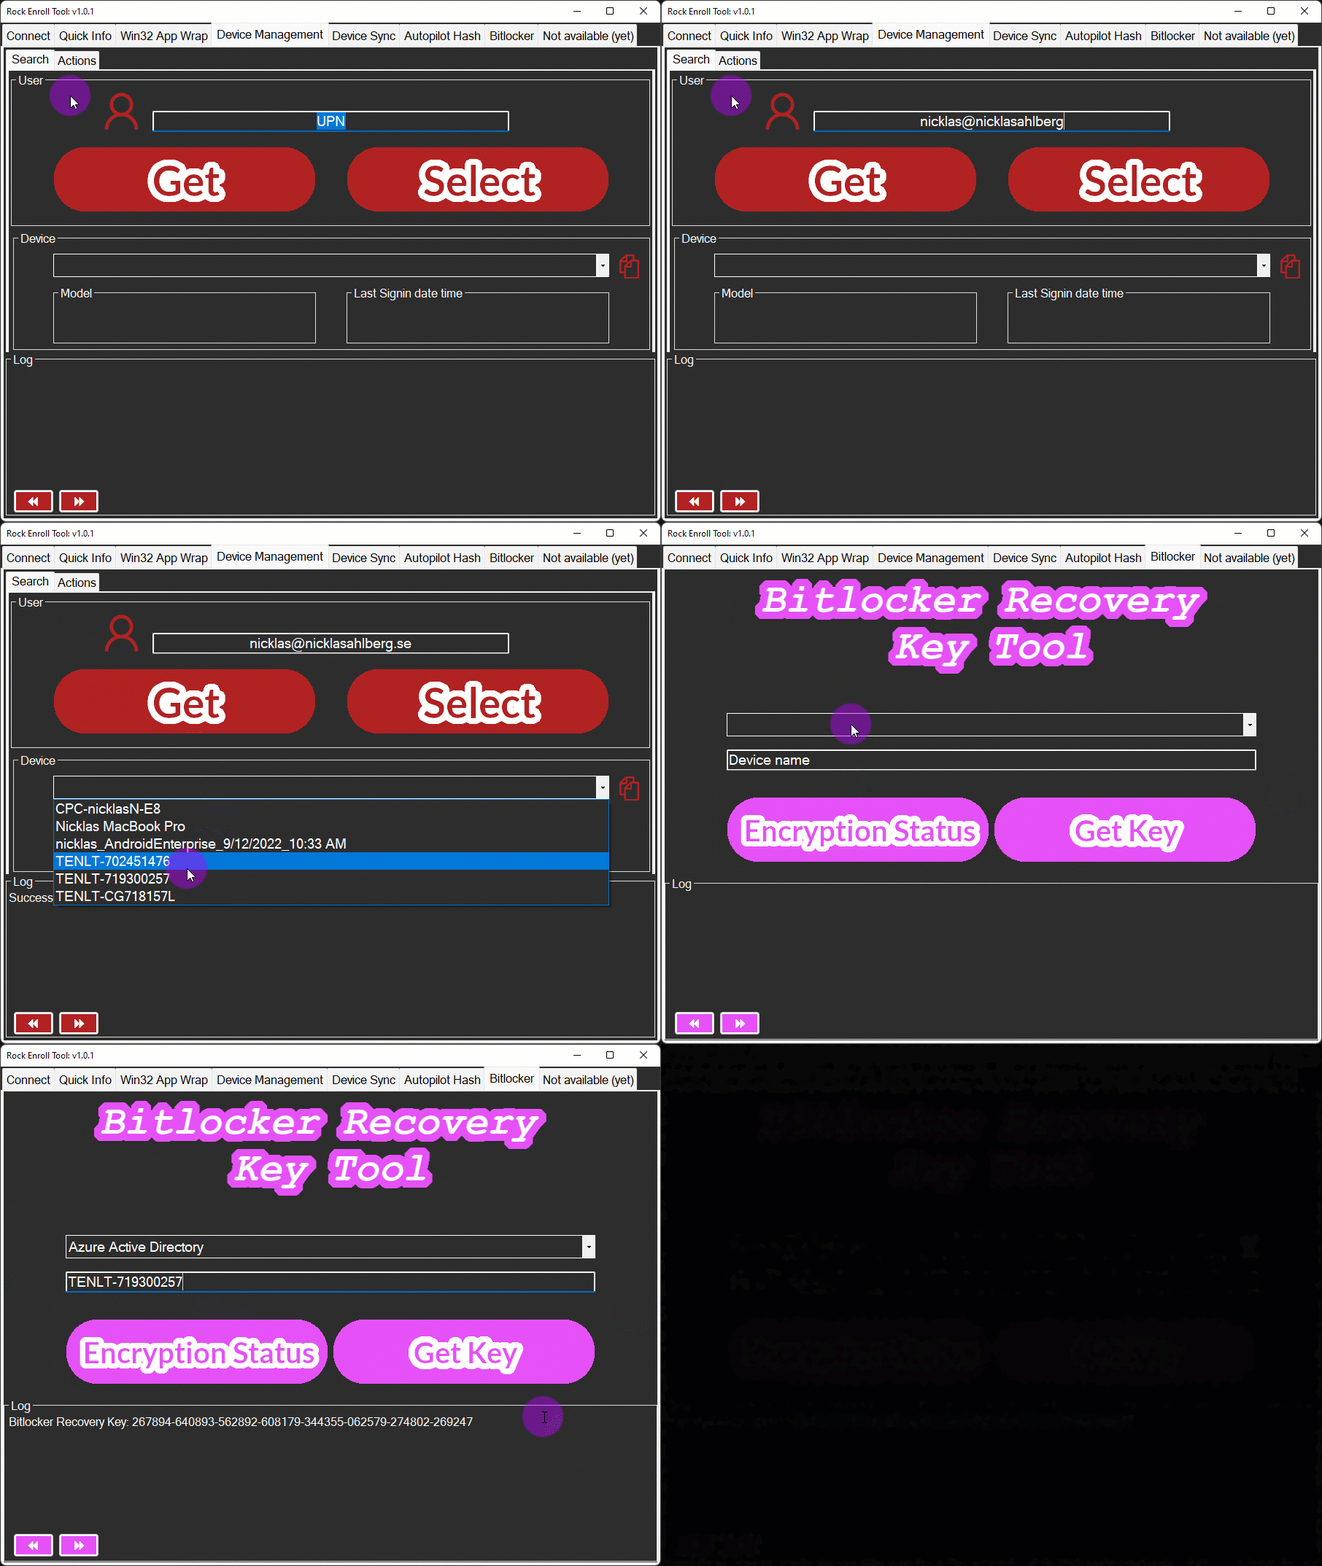
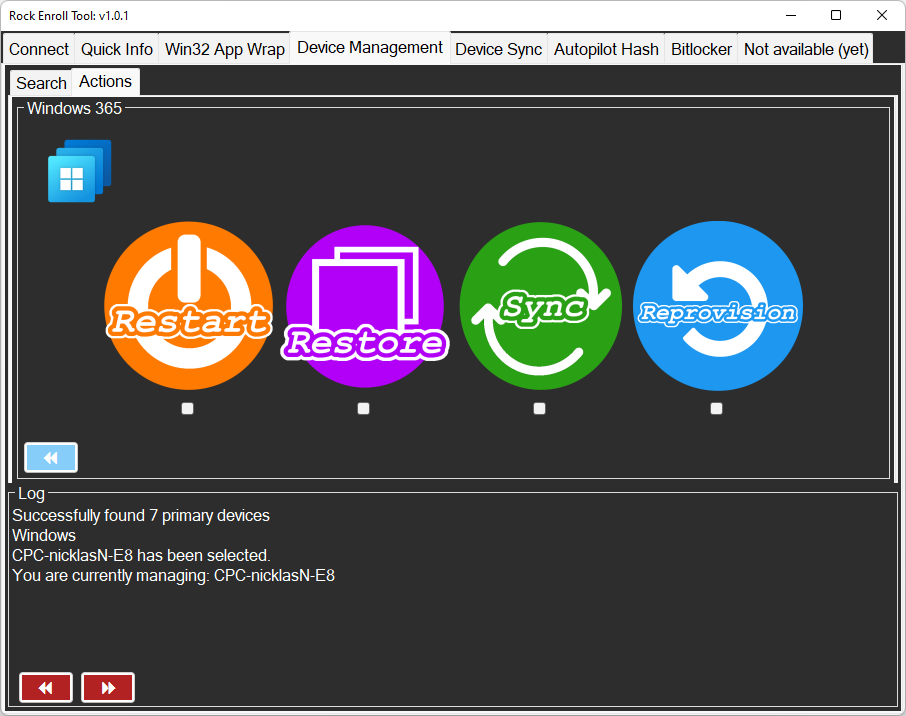
The device management tab allows us to find all devices related to a specific user. This is helpful when we have a user on the phone or face-to-face and we must find a specific device as soon as possible. No more device miscommunicated device names over the phone! 😅
Now that we have identified the correct device, we can run actions such as sync, restart, or autopilot reset.
✅Confirm the action by checking the corresponding checkbox!
The tool currently supports the following operating systems/form factors. More to come!
- Windows 10/11
- Windows 365
- Android
- macOS
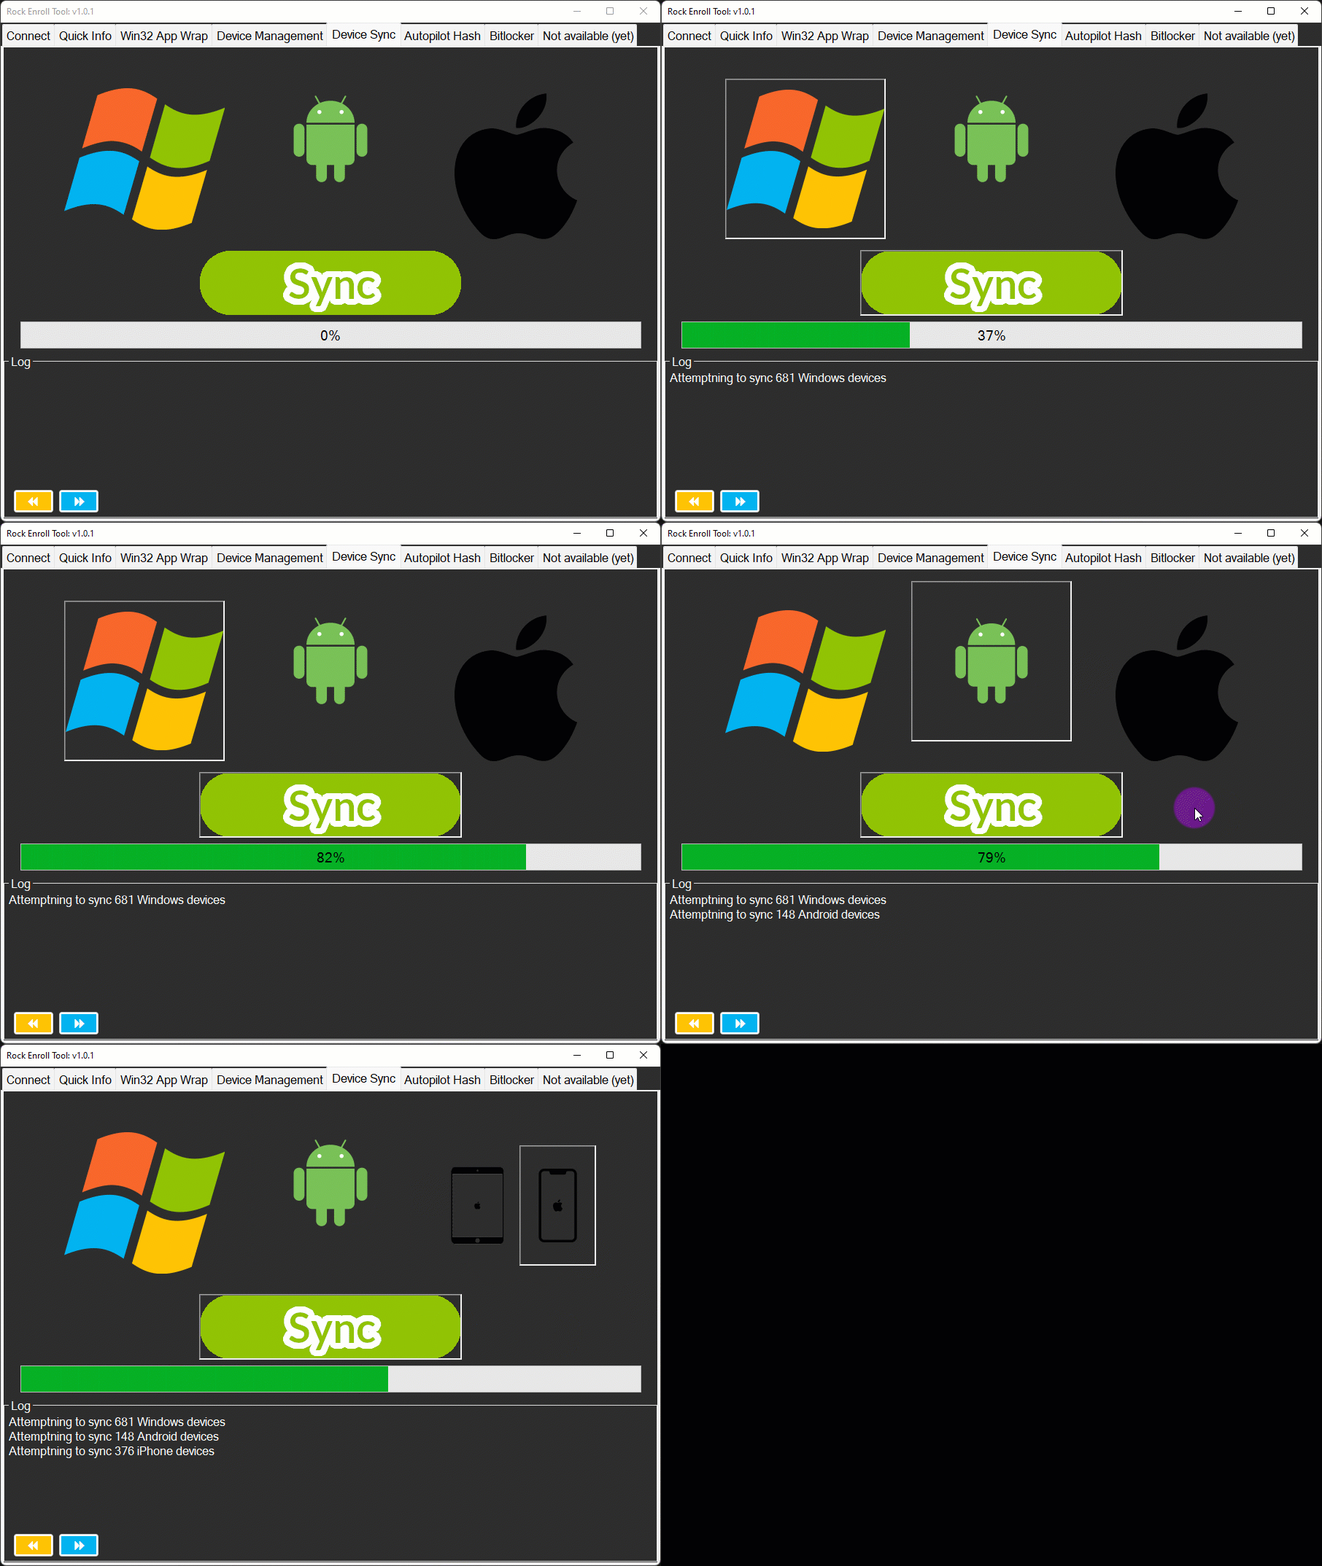
Rock Enroll Tool: Device Sync
Use the device sync tab to sync all devices of a specific OS. This is extra helpful after we have made an important change that we want to push ASAP.
The tool currently supports following operating systems/form factors. More to come!
- Windows 10/11
- Android
- iOS
- iPadOS
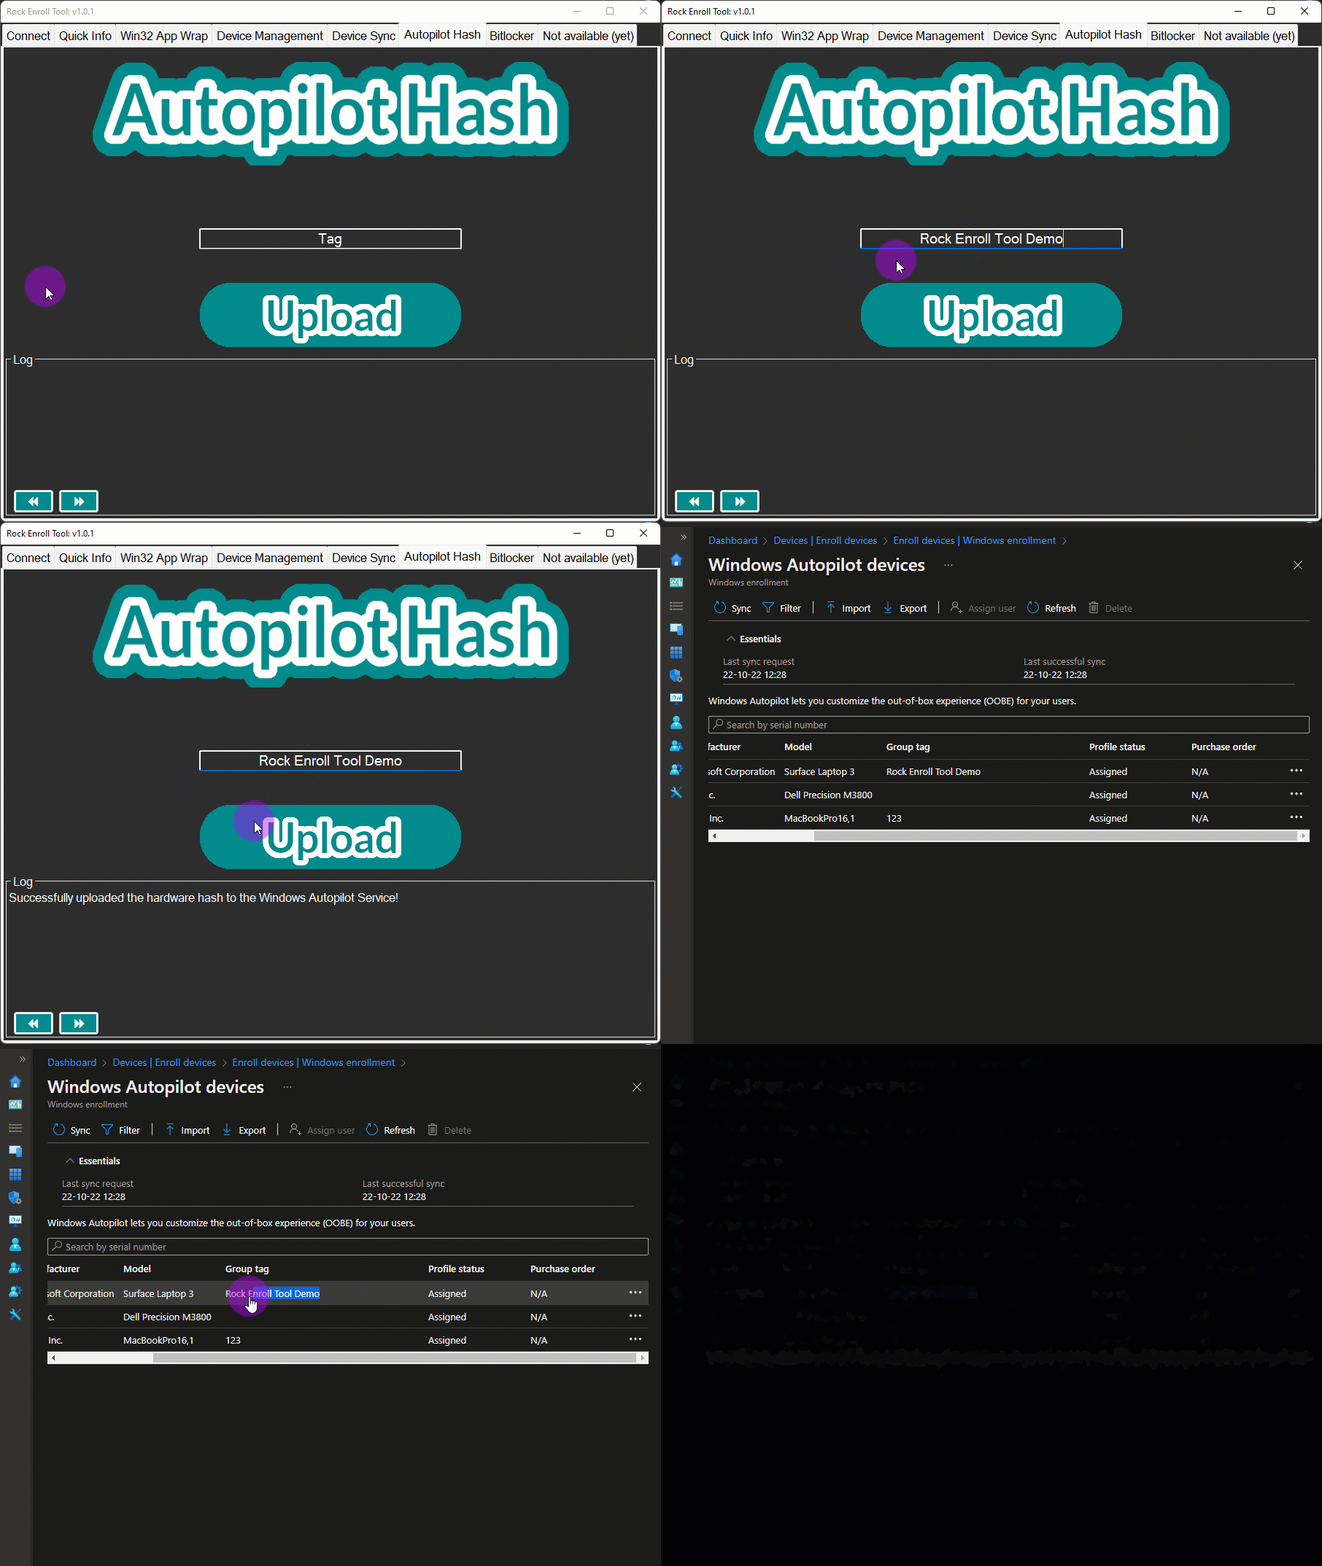
Rock Enroll Tool: Autopilot Hash
The good old Autopilot Tool has gotten itself a glow up 🤩The Autopilot Hash tab allows us to upload the hardware hash ID to the Windows Autopilot service with ease. Optionally add a tag and click “Upload”, easy as that!
Rock Enroll Tool: Bitlocker
The Bitlocker tab allows us to fetch the Bitlocker key from AD or AAD. It makes for a better admin experience as we do not need to cross-reference different systems to get the job done. Having the possibility to get the key from both AD and AAD from a single tool makes the transition from AD to Azure AD easier.
Start off by picking either AD or AAD as the location and just provide the computer name to get the key.
✅Pro tip! If you have a user on the phone who needs the key: search the UPN, pick the right device and click the copy button.
OK! Now that we know what the tool is all about…
…. how do we get started? – It is easy, just follow the rest of this post and you will have the tool running in no-time 😃
Prerequisites
We need to take care of some prerequisites before we can start using the tool.
❗Install RSAT if you want to collect Bitlocker keys from AD.
Prerequisite: Permissions
The user running the tool will need to have atleast:
BitlockerKey.Read.All
Read BitLocker keys
CloudPC.ReadWrite.All
Device.Read.All
DeviceManagementConfiguration.Read.All
DeviceManagementConfiguration.ReadWrite.All
DeviceManagementManagedDevices.PrivilegedOperations.All
DeviceManagementManagedDevices.ReadWrite.All
DeviceManagementServiceConfig.Read.All
DeviceManagementServiceConfig.ReadWrite.All
Directory.Read.All
User.ReadWrite.All
Prerequisite: Install MSAL.PS module
- Run: PowerShell as admin
- Run: Install-Module MSAL.PS -Force
Prerequisites: Enable RSAT (optional)
- Run below in PowerShell as admin
- Install ADDS RSAT feature: Add-WindowsCapability -Online -Name ‘Rsat.ActiveDirectory.DS-LDS.Tools~~~~0.0.1.0’
- Install Bitlocker RSAT feature: Add-WindowsCapability -Online -Name ‘Rsat.BitLocker.Recovery.Tools~~~~0.0.1.0’
Prerequisites: Register the app
We will use an Azure registered app with delegated permissions to execute our MS Graph calls against. Please note that the app itself cannot do changes beyond these permissions even if the user running the tool has more permissions, and the other way around. The next steps cover how to create the app and delegate the appropriate permissions.
- You will need either Global Administrator or Application Administrator to register the app in Azure
- Navigate to: https://portal.azure.com
- Click: Azure Active Directory
- Click: App registrations
- Click: New registration
- Name: I will use ‘Demo-Graph‘, but you may name the app differently (What about “Rock Enroll App”?)
- Supported account types: Accounts in this organizational directory only
- Redirect URI (Select a platform): Public client/native (mobile and desktop)
- Redirect URI (URL): https://login.microsoftonline.com/common/oauth2/nativeclient
- Click: Register

- Save the Application (client) ID in notepad, we will need it later
- Click: API Permissions

- Click: Microsoft Graph

- Click: Delegated permissions

- Search for and mark:
- BitlockerKey.Read.All
- Read BitLocker keys
- CloudPC.ReadWrite.All
- Device.Read.All
- DeviceManagementConfiguration.Read.All
- DeviceManagementConfiguration.ReadWrite.All
- DeviceManagementManagedDevices.PrivilegedOperations.All
- DeviceManagementManagedDevices.ReadWrite.All
- DeviceManagementServiceConfig.Read.All
- DeviceManagementServiceConfig.ReadWrite.All
- Directory.Read.All
- User.ReadWrite.All
- Click: Add permissions
- Click: Grant admin consent for…

- Click: Yes
- Make sure that the permissions have been granted accordingly

- Now navigate to https://portal.azure.com/
- Click: Azure Active Directory
- Save the Tenant ID in notepad, we will need it later.
Let’s go!
Download
The Rock Enroll Tool is downloaded from my Github. All new versions will be added to the “releases” section.
- Download link: https://github.com/NicklasAhlberg/RockEnrollTool
- Find latest version from the releases section
- Extract the content and open config.txt
- Add your tenant and clientID (from Notepad), save and close config.txt (leave domain and defaultTag).
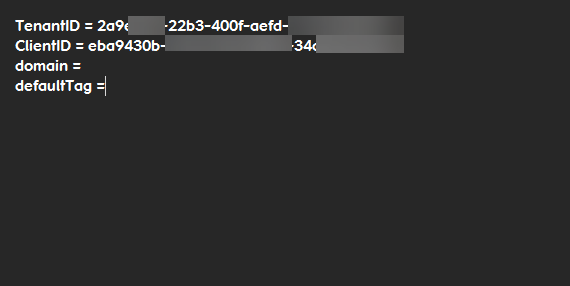
- Run the tool, sign in and have fun!

Hi, I only see a readme.md in your GitHub? Is that correct?
Hi, thanks for reaching out! The downloadable content is found to the right in the “Releases” section. Hope it helps!
Br
Nicklas Ahlberg
Hi, this fantastic tool, can i get the source code please.? and can we use it with company logo change internally
Hi Vijay, thanks for reaching out. I will send you the source to you in an email.
Best regards
Nicklas Ahlberg
Can i get the source code/PowerShell scripts please.? i see the code is embedded in an EXE file, would help if we get the source code so that we can customize as per our requirements.
Hi Vijay, thanks for reaching out. I will send you the source to you in an email.
Best regards
Nicklas Ahlberg
Hi Nicklas,
Can you please share the source code at vijay.belgaum@gmail.com. Trying to respond to you since few weeks but the comments are not getting published.
Thanks – Vijay
This looks like a very handy utility! Thanks for sharing it! Could you please also send me the source?
Ich würde wenn es noch möglich wäre den Code benötigen für Firmenanpassung.
Beste Grüße